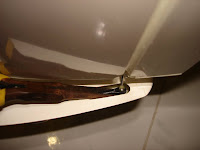
The V-tails came with a set of torque rods for controls.

Glue the torque rods in with epoxy, make sure they are 90 degree when view from front and side.


Epoxy in a link ball to the ends, raptor link balls used. Note the distance between the two link balls. This will be used for the servo tray template later on.

They are connected to the servos in front via CF tube. 6x4mm CF tubes were used as they are quite stiff, less slop. The end of the CF tube was a raptor ball link, glued into a short section of 4x2mm CF as spacer.

Its abit tricky to clip the ball link onto the ball , used a long nose plier to hold onto the CF tube through the small gap at the tail.

Made a template for the servo tray in front. The distance between the link balls was 20mm. Use this to ensure equal distance at the servo end so to get the correct geometry between the servo horn, CF tube and V-tail torque rod.

Trial fit with the servos. Adjust and mark out positions then cut out the servo tray from ply wood.

Connect up the V-tail with the CF tubes, the other end of CF tube glued with threaded rods to thread into clevis for control horn. Ensure V-tail at neutral then epoxy in the servo tray. Also epoxy in the connectors for the wing servos.

To keep the antenna straight in the fuselage, use some plastic tubing.

Cut the wing servo covers to size.

Had to add more than 200grams of weight in the nose for balance. Fishing weights and blue tack work great. CG set at around 55~60mm from LE.

Finally done, a coat of polish to finish up. Now we wait for good conditions to madien


No comments:
Post a Comment