The kit comes very ready with lots of details already done at factory, so just need to glue on the tails and installed the 2 servos and we can go flying!
Lets looks at what comes in the kit.
-almost completed fuselage
-Horizontal stab
-Vertial stab
-bag of misc hardware.
Wing in carbon and composite materials with iron on covering, very well made
Fuselage, pod glued, v-mount glued. push rods installed, push rod housing glued down
Hardware bag
Lets get started
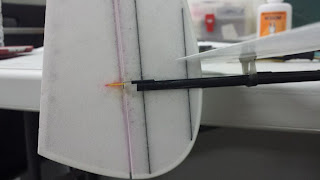
Follow the manual cut a slot in rudder for control horn (50mm from bottom). Ensure its straight, Glue control horn with thin CA.
Attached elevator push rod to V-mount. Cut a 16mm slot in horizontal stab from center , just behind carbon spar. Careful not to cut the spar. Put stab on to V-mount and align to boom , Glue with thin CA.
Attached rudder push rod and align vertical stab into the slot. Ensure its perpendicular to rudder and glue with CA. Use medium CA to fill in the gaps at the tail.
Elevator use stock control D47 horn, 2nd hole from center (6mm).
Rudder use furthest hole (8mm) or if you like more throws change to longer arm.
My tray layout. using 1s138mah, needs another 3g infront to balance at CG75mm. AUW is 95grams.
Mine's red
Rest of the build pics.


1 comment:
from where do we get rc models,
i bought 1 biplane and air show from www.hobbybazaar.in but those are the rubber powered only.
Post a Comment