It flew! Finally completed the discus n brought it to the slope. Was abit scare, hesistant with the fuzzy feeling, dont know if she's going to fly... The winds were changing directions on and off, maybe i should wait for another better day, nah couldn't wait, i had to do it. Took out the elster for first flight to get a feel and mentally prepare myself. The launch, turns, approaches for landings were rehearsed. Did a range check , ok, control surfaces check, ok.
Thats was it all ready to go. I could feel my adrenaline pumping as i held the plane at the edge of the slope ready for launch. All eyes were on this one as i passed the plane to WY for the first launch. 3,2,1 go. Off she went. She was diving quite fast I had to hold lots of up elevator to keep her up.First few rounds were tensed as I was not used to size and speed.Had to bring her down for landing as she was at too low attitude. The first landing was quite hot and she skidded on touch down. Phew sense of relieve as i went to pick up the plane. CG was too forward, move the battery pack back,wait for my heartbeat to settle down for another go. This time self launched it and she flew beautifully. The handling was crisp, solid and she had good energy retention. 2nd landing was better managed. Will spend the next few flights trimming her out more.
Some of the finishing build pics. Made plug-n-fly wings so that the wings servos are auto connected when i slot the wings in. Did this by first using transparency plastic sheet as template to mark out the position of the deans 3pin connector. Use the 2 incident pins as guide. Flip it to the other side n mark out the same position on the fuselage area. Slowly dremelled out the hole to fit.Made my own twisted extension wire (suppose to reduce interference) by first splitting them into individual strands, then slot into the dremel tool, hold the other ends together n spin. Soldered extension wire to the wing servos, slot through the hole n solder to deans connector. Slot in and glue with slow-cure CA. Did this for fuselage side as well. Turned out pretty fitting. metal crevis for the controls. Then cut servo covers to size.
Fuselage. The elevator was connected using a ball link with stud type. TT raptor ball link connectors with TT heli rods connects to the elevator servo. No slop at all! Epoxied the servo the some balsa pieces so that it can grip on both insides of the vertical stab.Epoxy it in. The rudder piece was the most time consuming part. Had to measure many times the position of the ball link placement to ensure no binding.The rudder is hollow as well so drilled out a larger hole, filled it up with epoxy and microballon mix so the that ball link has some where to stick to. Rudder pushrod used was a 4mm carbon tube. The rudder control outlet was slanted so the servo had to be placed on starboard side to ensure no binding. Servo tray reworked. Finally glue in the rudder stab.
Final steps. Made the battery pack. Measured the incidence of the wings and stabilizer stab. Made weights with fishing sinkers to get the correct C.G. Finally polish the wings , fuselage with some car wax.
Sunday, December 31, 2006
Tuesday, December 26, 2006
Discus build contd. I
Its X'mas, didnt manage to finish the discus in time. Not much lost as winds wasn't great when i went to the slope in the afternoon. Its blowing way too much from the left. Trying to finish up the plane next few days as im on leave. kekeke.
Some build pics. Discus parts. Some specs of the Baudis Discus 2b.
Wing Span: | 2.5 m (98") |
Wing Area: | 28.5 dm2 (442 sq. in.) |
Wing Airfoil: | S 3010 |
Wing Loading: | 40 g/dm2 (12.7 oz/sq. ft.) |
Flying Weight: | 1.1 kg (39 oz) |
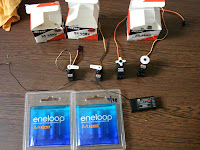
Used greatplanes small nylon control horns for the ailerons, cut off the mounting tabs and drilled in some holes at the bottom for the epoxy to grab. Measure out the aileron placement n dremel it! Not just the wings are hollow, the aileron as well. Epoxy the control horn in , with fillet of epoxy all round the sides for reinforcement. Make sure the control horn holes are at or behind the hinge line to get more leverage.
Made a template for the rudder servo tray , then use it to cut out 3mm ply.
Always measure twice, cut once!
To be continued....
Labels:
Discus,
Discus build,
Slope
Tuesday, December 19, 2006
Fast delivery from Japan
My last bit of RC goodies for the year arrived from Japan. Main order was the JR 9xII set, the gy401 n 9254 combo was ehhem ... preparation for entry to the dark side next year. lol. The delivery from www.rc-champ.co.jp was amazingly fast! Although i had to wait about a week for them to get hold of an English set of 9xII, I only paypalled them on Sunday n the stuff arrived today. Thats 3 days! Had to travel in the pouring rain to Singpost Paya Lebar to collect the items.
I opened up the box n seem to be missing some items. The set comes with 1 xPCM9XII transmitter, 1xRS77S receiver, 3xDS362 servos. Suppose to include the switch harness ,RX battery and charger. At first i thought the NiCd Tx batt was missing as well as i only have a battery case. I cant read jap but i guess have to pay extra for the 8N1100L battery as seen in the pdf pricelist here. Emailed them about it, see whats their response later. Well its still quite alot of savings (almost 30%) ordering from there compared to from LHS, those digital micro DS362 servos are much more useful to me than the normal size ES539s which comes in those sets at LHS and they even provided the english manual. Kao imagine how much profit LHS makes from each set. Thats why i seldom order big tickets stuff from LHS nowadays, it just doesnt make sense to pay more.
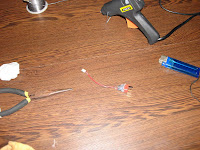
Nimh loses charge fast so i didnt want to use them for the Tx. I made an adaptor with a male deans to use my existing 3s1200mah lipos since i got 4 of those. Some hot glue after soldering so that i can have something to grip to unplug. The battery area is small and the lipos just fit nicely. Any bigger ones will be unusable.
The synth module of the 9xII only comes with 10channels as its a japanese set and it doesn't have my existing frequency. Means i got to change my freq and i cant use my existing electron 6 Rx since they are on negative shift. Another package from aircraft-world should be arriving soon to take care of that. The size of the JR 9xII is similar to the futaba 9chp. The 9xII feels just abit better in my hands as they have the side cushions thingy and the hand grips are placed better. The new RS77S synth Rx is really nice too. Small compact size and light. Almost similar in size to the electron 6, best of all no crystals needed and its PCM. Just press and hold the scan button for 2secs, let go, press the scan button again to lock in to a new freq.
Time to read that thick manual....
Labels:
Electronics,
Tools Tips Tricks
Thursday, December 14, 2006
Discus build
Its been awhile, quite a few interesting events took place. We almost lost our only place to slope in SG. The authority was threatening to ban R/C flying on our one and only slope in Singapore, where local slopers have been flying for the more than a decade. Luckily and thankfully, the representatives from the governing body has called upon a meeting and demonstration on site, which at least gave us a chance to save it. See threads here and here. The winds came on and off, the season is not really here yet but can feel its almost here. The die hards slopers like me were there on weekends to test the winds and we managed to get small pockets of air time.
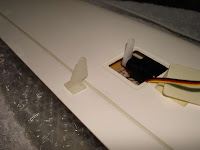
Back to the discus, me going slow on the build. Wet Sanded the edges of the joining surfaces to get nice smooth airflow. As can be seen, the wing is really thing. I m sure it can penetrate the winds well. Expoxied CF strips to strengthened the fuselage as it feels quite thin. Cut the mounting lugs off the HS65 and sanded the surfaces. Had to dremel off some of the material in the wings to get the servo to fit in against the spar. Still have to get some more hardware for the plane and awaiting my tx. Shld be fast once the hardware are ready. Hope i can madien it this Christmas day.
Labels:
Discus,
Discus build,
Slope
Subscribe to:
Posts (Atom)